But the best? The best is cooking either over a fire ... or in a wood burning pizza oven.

So, seeing how we always just get sh** done, my husband and I decided to build one a couple of summers ago. It took two summers altogether because we poured the cement platform at the end of one summer then built the oven last year. It was fun, challenging at times, and we certainly had some "duh" moments.
Here's a visual guide to building your own wood oven. I will describe exactly what we did, how we did it, what we used, and lessons learned!
Part One explains how to build the cement platform, and lets you know what you will need for this building adventure.
Part Two describes how to build the brick stand for the oven, and
Part Three guides you through the complex task of making your oven dome.
Part One of How to Build a Wood-Burning Pizza Oven from Scratch
What do I need to build my own wood oven?
First, you will need a flat area outside where you will have enough space to store wood, move around while you're cooking, and where you will not be smoked out when the fire is lit.
Materials:
 |
| Tools |
Measuring Tape
Square
Straightedge
Hammer and Nails
Building lumber
Spirit Level
Builder's String
Hoe
Rebar Mesh (two times the size of the cement platform)
Building lumber
Sand
Cement
Building Bricks - at least 200 regular size and 40 flat slabs
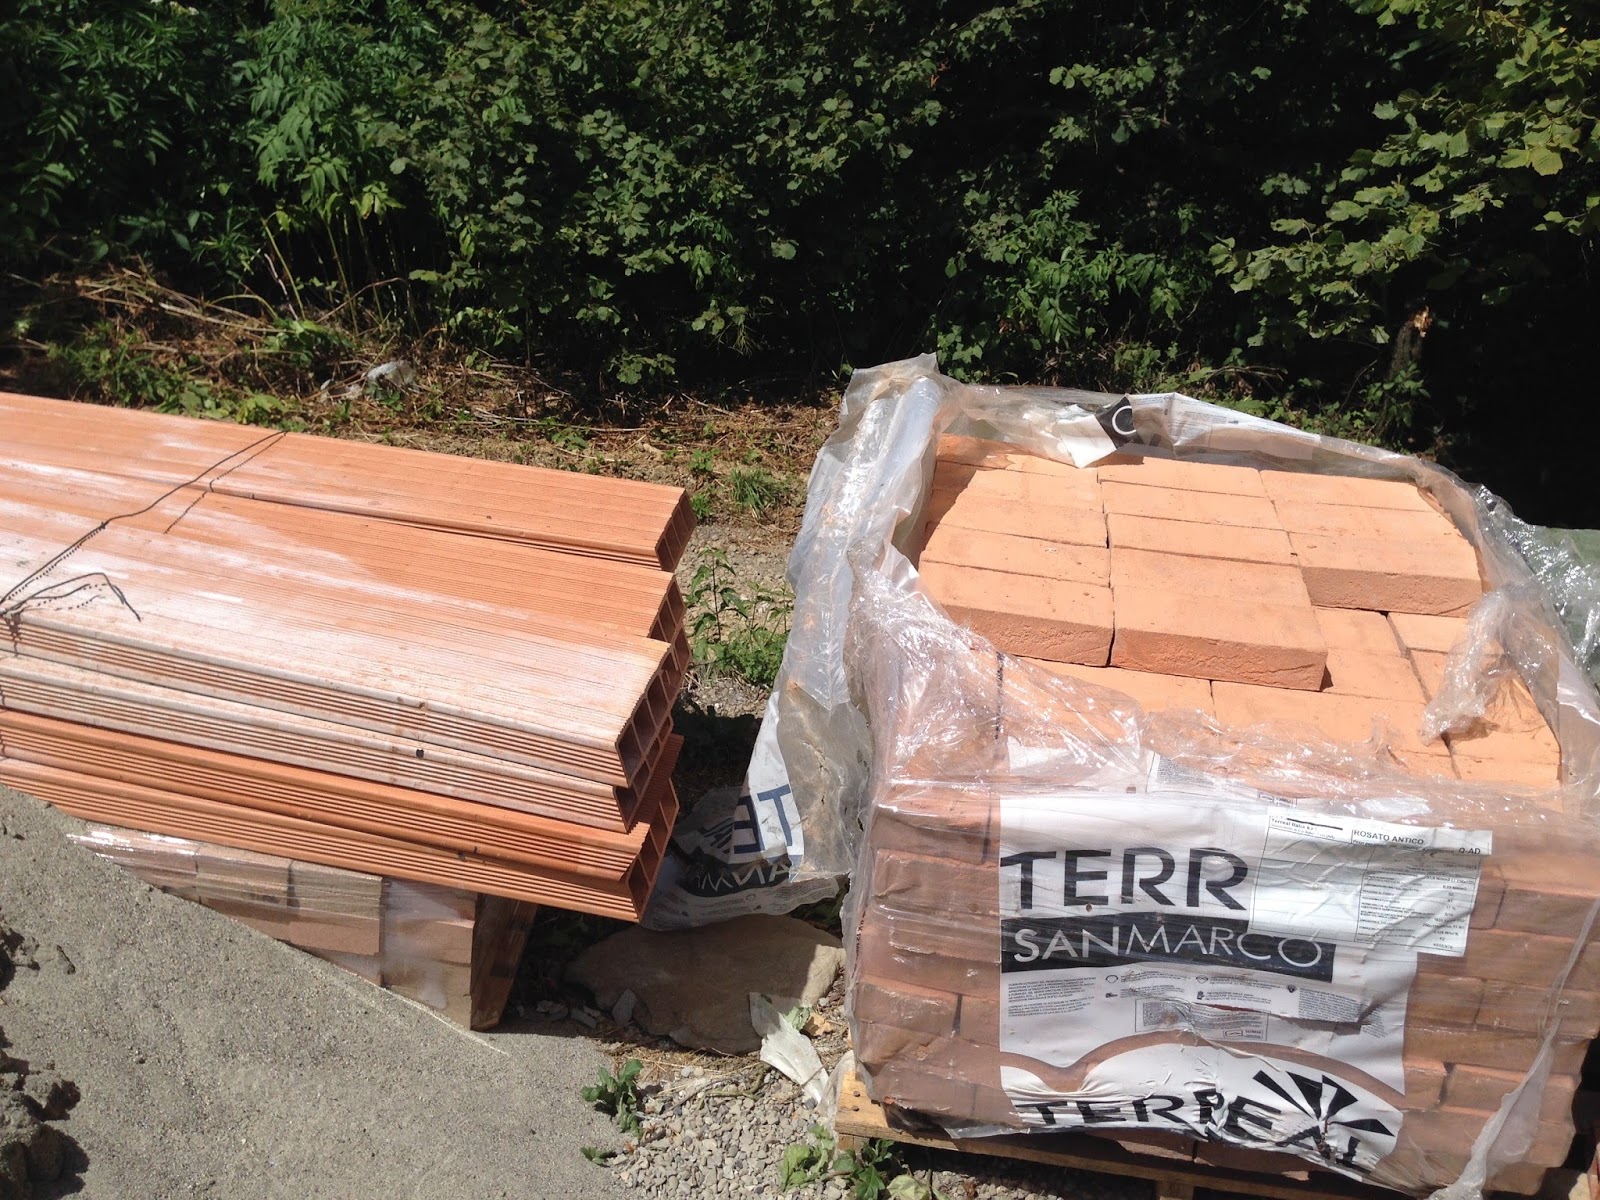 |
| Bricks for Wood Oven |
 |
| Fire Bricks |
Hollow clay slabs - enough to cover the stand: the first layer of the support for the oven.
We built our oven in Italy, you you will have to look at the measurements of the bricks in your country and calculate accordingly.
What to do?
First, who is building this thing? Whoever is building it or will use it should sit together, then wander about a bit, maybe with a beer or other cold drink in hand, and figure out where you want it. This is very important! You will be cooking food here, so it should be close to a kitchen or so.
Also, it's going to be smoking sometimes, so you want to position it somewhere the smoke won't be floating straight into someone's bedroom or whatever.
Okay, you've decided where you want it, now you have to build a flat cement platform that your beautiful wood burning pizza oven will rest on.
How big should the platform be?
We decided that we wanted an oven with an inside diameter of one meter. So, calculating from that, our stand needed to be about 1.5 by 2 meters. and the cement platform obviously bigger than that.
The nitty-gritty of making a cement platform:
Block out your area. You will need builder's string, your metal square, and some wooden stakes. You need a flat area!! If you're working on a slope, your construction will need to be levelled. It's possible - we built ours on a piece of land that is terraced and on a very steep hill. But it takes a lot more work, and you have to get to work with a shovel and hoe and make sure the whole area is flat (use a board with a spirit level on it if you don't have a long enough spirit level).
 |
| Measuring for the platform |
 |
| Using the Square |
 |
| String Guides for Frame |
 |
| Good Job! |
 |
| Flattening area |
 |
| Building Supervisor |
You're going to be pouring a four-inch foundation on to this rectangle. You want to make a frame that you'll be pouring the cement into. Find your boards (1 by 4 planks), two width length and two the length of the rectangle. Hammer the planks to the INSIDE of the stakes, and check again if everything is at right angles. Just for the sake of caution, you can hammer a stake in the middle of each longer board to prevent bulging. If the boards are 4 inches wide, the height of the frame will be a tiny bit smaller. Doesn't matter. You will be pouring to the top of the boards.
 |
| First side of rectangle |
 |
| First corner |

 |
| Completed frame |
 |
| Rebar mesh laid inside frame |
Pour the cement! Now you're ready to pour! If you're a seasoned cement user, and you have a cement mixer, mix your cement to a foundation-ready consistency.
 |
| Wheelbarrow full of cement |

and remember it's always better to have a little too much cement than too little! You can always find a small hole that needs a little cementing or just throw it in the neighbour's trash (kidding) but if you have too little, you need to make a cement run which is a hassle.
 |
| Cement Ready |
 |
| Pouring Cement |
 |
| Building Mama |
Like I said, we built our wood oven on land that is terraced, so we had to mix the cement in our mixer up top and then pour it down our home-built cement sluice to the lower terrace.You don't have to do this!!!
When your cement is poured, you need to make sure it's nice and flat.
 |
| First pour |
 |
| Flatten cement |

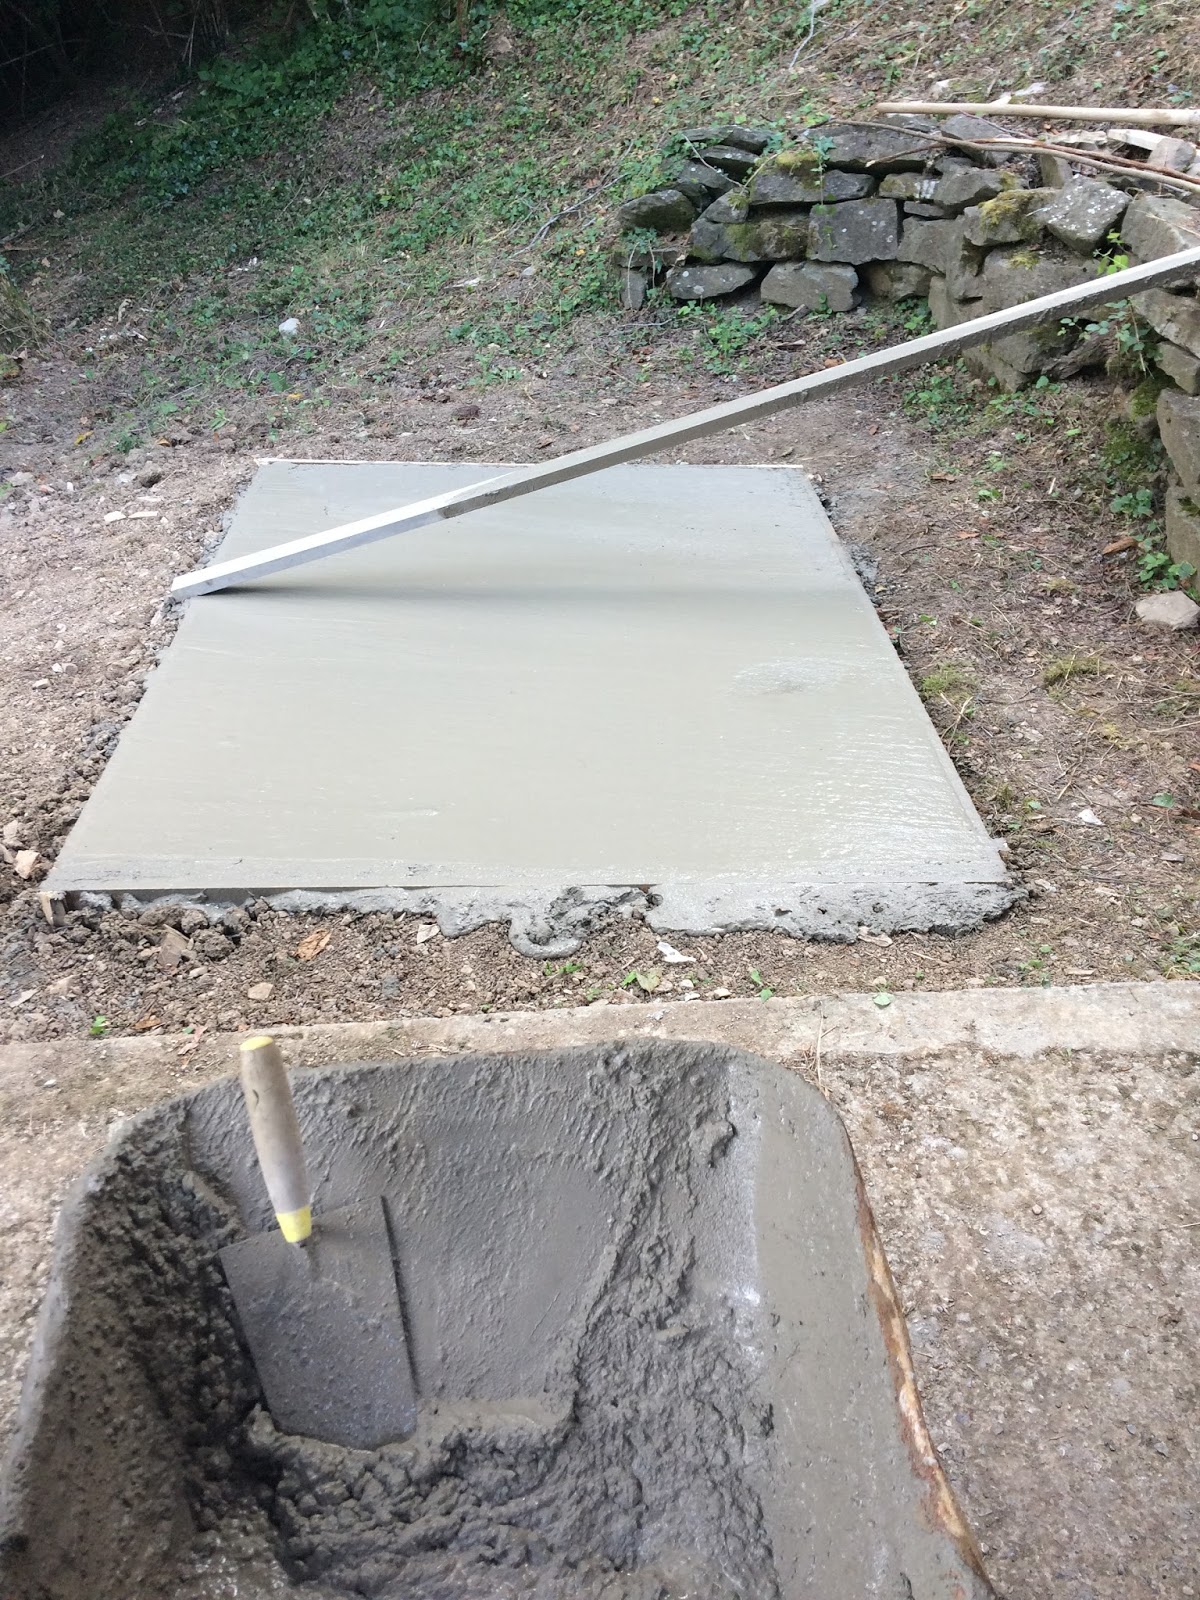 |
| Finished Platform!! |
Sit back and look proudly at your work. Let it dry for a few hours until it's hard, then water it twice a day for the next couple of days. Yes, water it. Pretend it's a lawn and sprinkle it well with water. This will prevent cracking. You can't go to the next step for at least 12 hours! Leave your boards on overnight so the cement will dry straight.
In the meantime, sit back and relax, and get ready for tomorrow, when you're going to build your brick stand.

Stay tuned for Step Two: How to build a sturdy brick stand for your wood-burning pizza oven.
